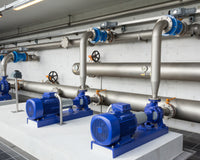

Even a perfectly selected expansion vessel will not protect the system from a dripping safety valve if it is installed in the wrong place. In this article, we show the most common installation errors and how to correctly connect an expansion vessel to C.H. and D.H.W. systems.
Where is an expansion vessel installed—on the supply or return line?
On the return line. This is what the user manual for our vessels requires: the vessel must be installed on the system return to the heat source. The water is cooler there, and the vessel operates at a pressure lower by the pump head—both factors extend the membrane's service life.
However, there is another overriding principle that is worth understanding—the connection point must “see” pressure changes throughout the entire system, not just in a short section. If the system contains a check valve, pressure reducer, or another component that blocks flow, the vessel must be located on the side that actually absorbs the pressure increase. Isolated from the system by a blocking component, it will not work, even if installed perfectly.
C.H. — installing an expansion vessel on the return line, before the circulation pump
The vessel is connected to the common return pipe close to the boiler or heat exchanger, before the circulation pump—on the suction side, where the pump no longer increases the pressure. Red vessels, BASIC and IBO ITALY series, are intended for heating systems: operating pressure of 8 bar, temperature up to 100°C.
Two practical tips. If the boiler or safety group has a factory-installed connection for an expansion vessel, use it—the manufacturer accounted for the system's hydraulics there. Also check the boiler documentation: low-power boilers for small houses and apartments often have a vessel installed inside the casing at the factory, and an additional one is only needed with a larger system water volume.
D.H.W. — installing an expansion vessel for a water heater on the cold-water line
For a water heater, the expansion vessel goes on the cold-water line, before the heater—never on the hot-water outlet. There, it absorbs the increase in volume during each heating cycle and eliminates leakage through the safety valve. The closer it is to the storage tank and its fittings, the faster it responds to a local pressure increase; installing it several metres away works less effectively.
The most common error in this arrangement is the absence of a check valve between the valve on the cold-water inlet and the tee connected to the vessel. Without it, when the pressure in the mains drops, water flows back from the water heater into the household installation. Pay attention to the order: the vessel must be on the storage-tank side, not before the check valve — otherwise it will not detect the pressure increase it is intended to compensate for. We described the types and applications of these valves in the article on IBO check valves.

The IBO CWU series, with hygienic approval PZH No. B.BK.60110.0515.2025, is intended for domestic water. One vessel cannot serve both C.O. and C.W.U.: a vessel from the heating circuit must not be transferred to domestic water because it has a different factory pressure and a different purpose.
Vessel support, position, and service access
The operating position is determined by the model's design and is indicated in its marking. A vertical vessel must not be turned upside down: the connection is at the bottom, the valve is at the top, and larger models stand on factory-fitted feet. Smaller ones are installed in a wall-mounted configuration. If in doubt, the permissible position for a specific model is given in its operating manual.
Vessels suspended from a pipeline become significantly heavier when filled with water. This must be taken into account when designing the installation to avoid damage. At the same time, remember that the pipeline must not transfer stress or vibrations to the vessel — it is not designed for this. Vessels with a 3/4" connection can be supported on a dedicated bracket: the red one for C.O. or the blue one for C.W.U.
Plan service access from the outset, not after the boiler room has been enclosed. The vessel must be accessible for inspection from every side, and the three valves — gas filling, isolation, and drain — as well as the nameplate should be freely accessible. It is also worth planning for the possible removal and replacement of the device without dismantling the boiler room.
Where is the diaphragm located? Inside the tank, it divides it into a water section connected to the connection and an air section. It cannot be accessed from the outside — only the air valve for replenishing the air is visible, identical to a car tyre valve, on the opposite side from the connection.
Installation diagram for the expansion vessel and required fittings
The assembly is simple: a tee on the return pipe or cold-water line, a union ball valve, and the vessel connection—and in D.H.W. systems, additionally a check valve before the tee. The water line leading to the vessel must include a shut-off valve with a drain function: without the ability to drain water from the tank itself, you cannot measure the gas cushion pressure or replace the vessel without draining the system.
A union ball valve takes care of both—after closing the valve, you unscrew the union and remove the tank without draining the water from the system. Pressure checking then takes a dozen or so minutes instead of an hour. A ready-made solution is the 3/4" diaphragm vessel service valve; for other diameters, use the ZS DN20/DN25 service valve.
Note: this is a service valve, not a regulating valve—it remains open throughout the operation of the system. When closed, it isolates the vessel from the system and leaves the system unprotected against pressure increases: each time the system heats up, the pressure rises until the safety valve operates. Turn it off only for the duration of measurement or removal; to prevent accidental closure by an unauthorized person, secure the valve after installation—remove the handle or use fittings that can be sealed. The connection diameter is selected according to the tank capacity.

| Series | Application | Connection |
|---|---|---|
| CO BASIC and IBO ITALY diaphragm vessels | central heating | 3/4" up to 36 L, 1" above 36 L |
| IBO D.H.W. | domestic hot water | 3/4" |
| IPRO FIX C.H./D.H.W. | C.H. and D.H.W. | 3/4" up to 36 L, 1" above 36 L |
Vessels for C.H. and D.H.W., replaceable diaphragms, flanges, and brackets can be found in the vessels and tanks category, while valves and the remaining system fittings can be found in the installation equipment category.
Diaphragm vessel installation and replacement step by step
The pre-charge pressure is set before screwing in the vessel—you cannot measure it reliably on an installed and filled tank. The value depends on the building height (C.H.) or the pressure reducer setting (D.H.W.); the calculation and adjustment are described in a separate guide on inflating a diaphragm vessel.
- Check the nameplate: operating pressure PS, operating temperature, and pre-charge pressure. Vessels without a nameplate or with damaged external coating must not be installed.
- Make sure that the safety valve setting does not exceed the vessel's PS.
- Set the pre-charge pressure in the empty vessel before installation.
- Switch off the heat source, wait for it to cool, and reduce the system pressure to zero.
- Make the connection: a tee on the return line (C.H.) or on the cold-water line upstream of the water heater, together with a check valve (D.H.W.); also install a ball valve with a union and drainage capability.
- Provide support suitable for the vessel’s capacity—factory-installed feet, a wall bracket, or a sufficiently rigid pipeline.
- Screw in the vessel, seal the thread, and tighten carefully. Position the vessel so that the pipeline is not under stress.
- Open the ball valve, fill the system, and check for leaks.
- Bleed the system and adjust the filling pressure.
- Check the result: run the system through a full heating and cooling cycle while observing the pressure gauge. A correctly selected and connected vessel keeps the pressure within a narrow range—sudden spikes after each heating cycle and discharge through the safety valve mean that something is wrong with the connection point, pre-charge pressure, or capacity.
Replacing an old vessel follows the same procedure, preceded by removal: switch off the system, wait for it to cool, reduce the pressure in the system and vessel to zero, close the valve, and undo the union. If the old vessel did not have its own valve, you must drain the entire system—this is the best time to add a service valve and also verify the vessel capacity selection.
Most common installation errors
- Vessel on the supply line. Higher temperature and pressure shorten the diaphragm’s service life.
- Wrong side of the pump. The vessel then does not operate at the point that stabilizes the pressure of the entire circuit.
- No check valve in the domestic hot water system. Water flows back from the water heater into the household plumbing.
- Vessel installed downstream of a flow-blocking component. Isolated from the system, it does not detect the pressure increase it is meant to compensate for.
- Too far from the boiler or storage tank. It responds more slowly to actual pressure changes.
- A heating vessel used for domestic water. Different factory pressure, different purpose.
- Service valve closed during operation. The system is left without protection against pressure increases.
- No support or a stressed pipeline. A filled vessel hanging on a single thread will develop a leak within a few seasons.
- Enclosure without service access. It prevents pressure checks and vessel replacement.
- Modifying the construction or installing it in freezing conditions. Welding, drilling and heating are prohibited and will void the warranty.
Remember to check the pressure in the vessel regularly — the frequency is specified in the manual for the particular model, and in practice, the minimum is an inspection before each heating season. Installation of an external vessel connected to the pipeline should be carried out by an installer or an experienced user; work on a gas boiler, including its built-in vessel, requires gas-related qualifications and service authorization. If the system continues to lose pressure, see bleeding a central-heating and booster pump.
FAQ — installing a diaphragm vessel
Where should a diaphragm vessel be installed in the system?
On the return line. The connection is made to the common return pipe close to the boiler, before the circulation pump, on the suction side. The water is cooler there, and the pressure is lower by the pump head, which extends the membrane’s service life.
Where should a diaphragm vessel for a domestic hot-water boiler be installed?
On the cold-water side before the water heater, never on the hot-water outlet, and as close to the storage tank as possible. Place a check valve between the valve on the cold-water inlet and the tee with the vessel — the vessel must remain on the storage-tank side so that it detects the increase in pressure during heating. Use a vessel intended for potable water, such as one from the IBO CWU series.
Can a diaphragm vessel be installed horizontally?
It depends on the model. Smaller vessels are available in a wall-mounted version, while larger ones stand on legs. The permitted operating position — vertical, and for some models also horizontal — is specified in the manual for the particular vessel. Regardless of its position, the structure must support the weight of the tank when filled with water and must not transfer stress to it.
Where is the diaphragm located in a diaphragm vessel?
Inside the tank. The membrane divides it into a water chamber, connected to the fitting, and an air chamber. It cannot be accessed from the outside — only the valve for replenishing the air is visible, on the opposite side from the connection. In the BASIC and IBO ITALY series, the membrane is replaceable.
Does a diaphragm vessel need a shut-off valve installed?
Yes — the water line leading to the vessel must have a shut-off valve with a drain function; otherwise, you cannot measure the pressure in the gas cushion or replace the tank without draining the system. This is for servicing only: it remains open throughout system operation. After installation, it is worth securing it against accidental closure, for example by removing the handle.